I wanted to capture my favoured artistic medium in this journey piece so I considered how best to use glass as the foundation for my deconstructed wire brain. I wanted the glass to be understated, to allow the wire to be the focus as it travelled down to its roots and to my memory map, I also had to identify a means of displaying those memories. I tried out several ideas and opted to use a plain copper foiled glass stand.
Copper foiling is a method of joining glass pieces using a sticky copper tape to edge the glass pieces and then soldering them together; a method made popular in Tiffany style lamps.
I created a cutting pattern for the glass, which had to accommodate a hole for the stem to pass through. Each piece of glass was prepared for taping by running it past the grinder which gave the edges a slightly course surface for the tape to stick to.
The copper tape was then fixed to each of the pieces. The tape comes in different gauges to suit the different thicknesses of glass. The tape should be wide enough to be wider than the glass and when placed on the glass it should overhang to wrap around the glass evenly on both sides. Once it is fixed to the glass a 'fid' tool is used to smooth the tape to the glass and provide a regular and firm bond.
After the foil tape is applied I like to 'tin' the tape before soldering them together. This involves applying a thin layer of solder to all of the foil edges, which turns it silver, or tin, coloured. This isn't a necessary step however I find it helps the soldering process. Before you apply any solder you have to brush a liquid flux onto the foil; the flux acts as a catalyst that helps the metals in the foil and solder to bond more easily. I use a water based flux as it is less destructive to the environment.


I had arranged the photographs I was using for my memory map into a pattern that worked as a flow, a journey, and then photographed them in place. I could have created a collage in Photoshop however this approach had a more irregular layout. I did use Photoshop to create a transparent background. I printed the map onto clear acetate in both colour and black & white. I then placed both copies into the glass with the wire roots to determine which option to go with. I preferred the colour print as it would compliment the copper wires and sit well alongside the brain infinity mirror.
I then soldered all of the pieces together making sure I supported the glass stem section (a borosilicate glass tube) so that it didn't break or cause the foil to be pulled from the glass.
The finished piece now has silver coloured foil. In some pieces this could be desirable however in others in may not. The silver solder can be recoloured by applying a patina, an acid that causes a reaction in the solder that causes it to turn to a copper colour or black. I wanted to use black in this piece so that it would not detract from the copper wire or the images. I thought it would also give the base some weight if it looked like worked iron.
All that was left to do was to wash off all flux and patina residue (the acids would eventually eat away at the copper foil and destabilise the piece), affix clear rubber feet underneath each corner and rearrange the brain synapses into the desired structural layout.
To finish the whole piece I had to deconstruct the glass brain. Don't worry, this doesn't involve taking a hammer to my cast glass; I'm going to use digital photographs instead... Phew!
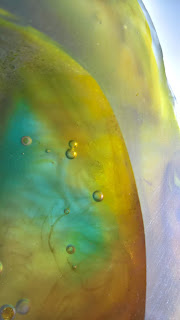
I carefully considered the many photographs I had taken of my exploring the varied colours, shapes, patterns and flows that could be seen inside the brain's glass. I opted to work with the images of its' inside as they would never be seen again. I liked the idea that they were only available to be seen up to the point they were bonded with the glass, which was only about 30 minutes. However, they are still there but hidden from view. The use of photographs gave the opportunity for the viewer to feel privileged to witness the inner secrets of the glass, just as the journey and memory map revealed my inner secrets.
Next, and final, step is to install the complete work...


